Bin Location Management gives your dealership a centralized place to view, search, rename, and delete bin locations used across your parts workflows. Bin locations are also available as selectable values in Inventory Item Detail, Smart Receiving, Part Receiving, and Physical Inventory, helping keep bin information consistent throughout your inventory processes.
Access Bin Management
If you have the Bin Management user permission under Parts, you can access the Bin Management page from the Management section of the Parts Collapse Menu navigation. The Bin Management option appears below Category Management. Users without the required permission will not see the menu option and cannot access the page.
View and Search Bin Locations
The Bin Management page displays your dealership’s current bin locations in a searchable list. Each bin appears as its own row and includes options to edit or delete the bin. Use the search field to filter the list and find specific Bin Names.
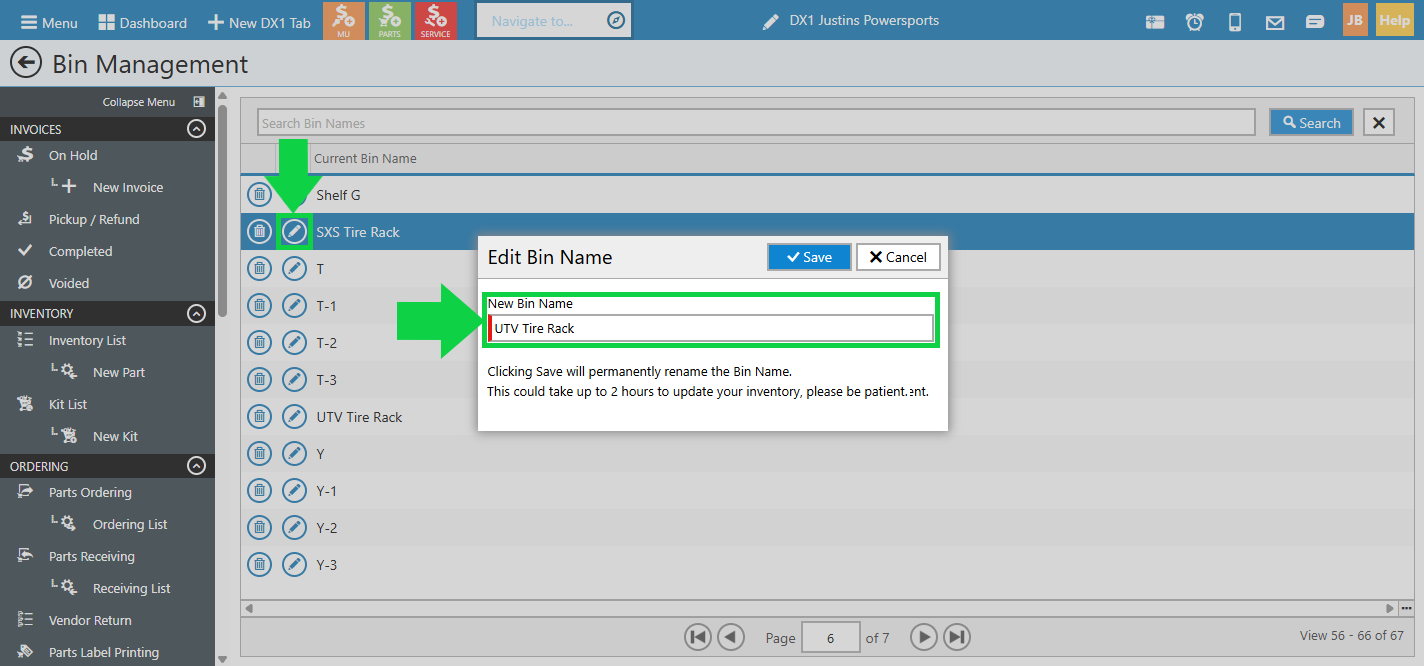
Rename a Bin Location
To rename an existing bin:
Open Bin Management.
Find the bin you want to update.
Select the Pencil icon.
Enter or select a New Bin Name.
Save your changes.
Changes to affected part records may take up to 2 hours to appear throughout the system (Invoices, grids, etc).
If you rename a bin to a bin name that already exists, impacted parts are reassigned to the existing bin rather than creating a duplicate. The original bin is then removed from the Bin Management list.
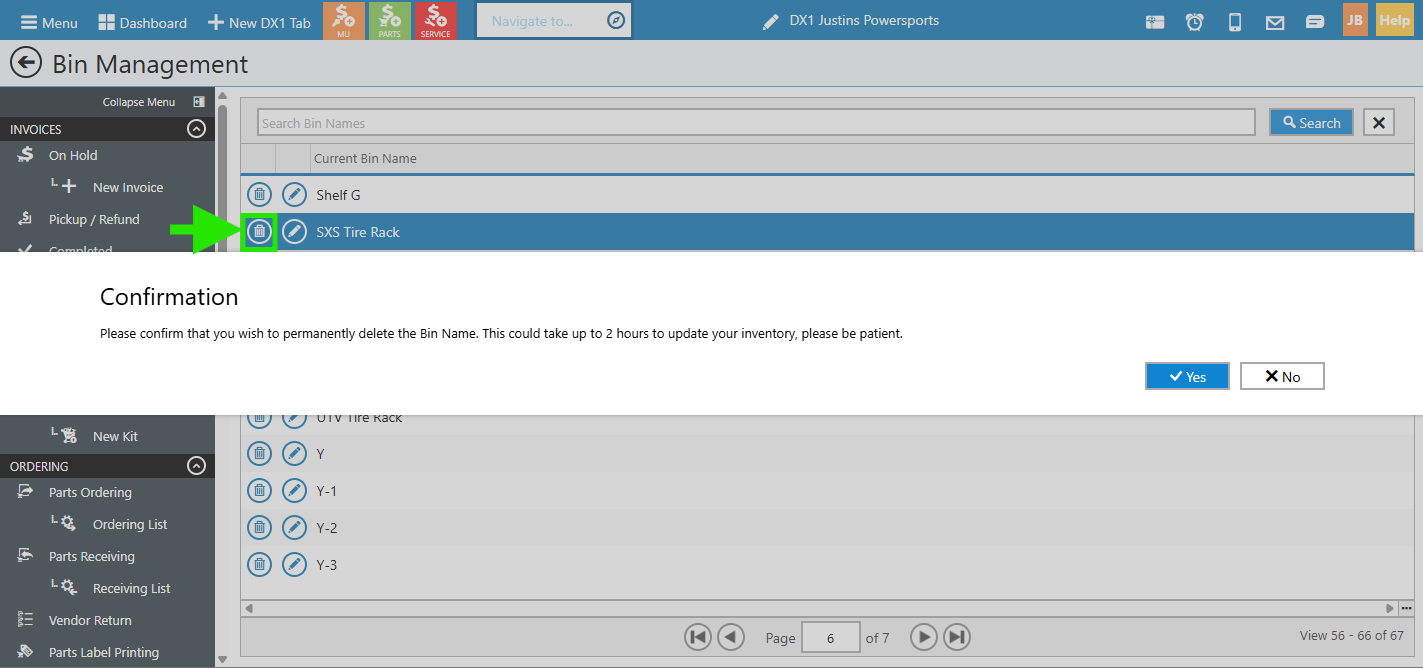
Delete a Bin Location
To permanently remove a bin:
Open Bin Management.
Find the bin you want to remove.
Select the Trash Can icon.
Confirm the deletion.
Deleting a bin permanently removes it from the Bin Management list and from impacted part records. Updates may take up to 2 hours to appear throughout the system (Invoices, grids, etc).
Select an Existing Bin
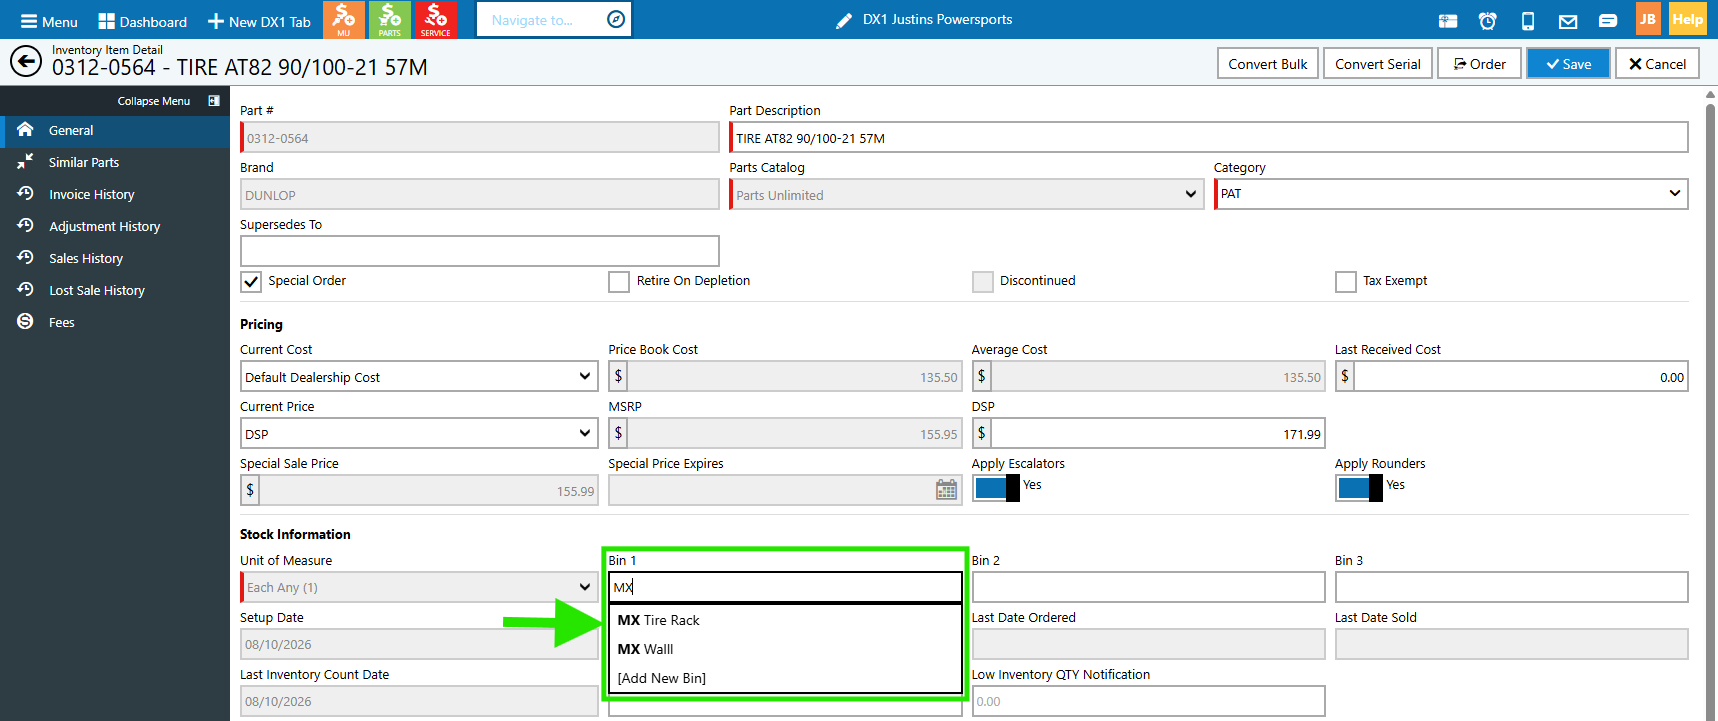
Bin 1, Bin 2, and Bin 3 fields in parts workflows now use selectable bin values.
When you open a bin field, you can:
View existing bin locations.
Start typing to filter the list.
Select the appropriate bin for the part.
This functionality is available in Inventory Item Detail, Smart Receiving, Part Receiving, and Physical Inventory.
Add a New Bin Location
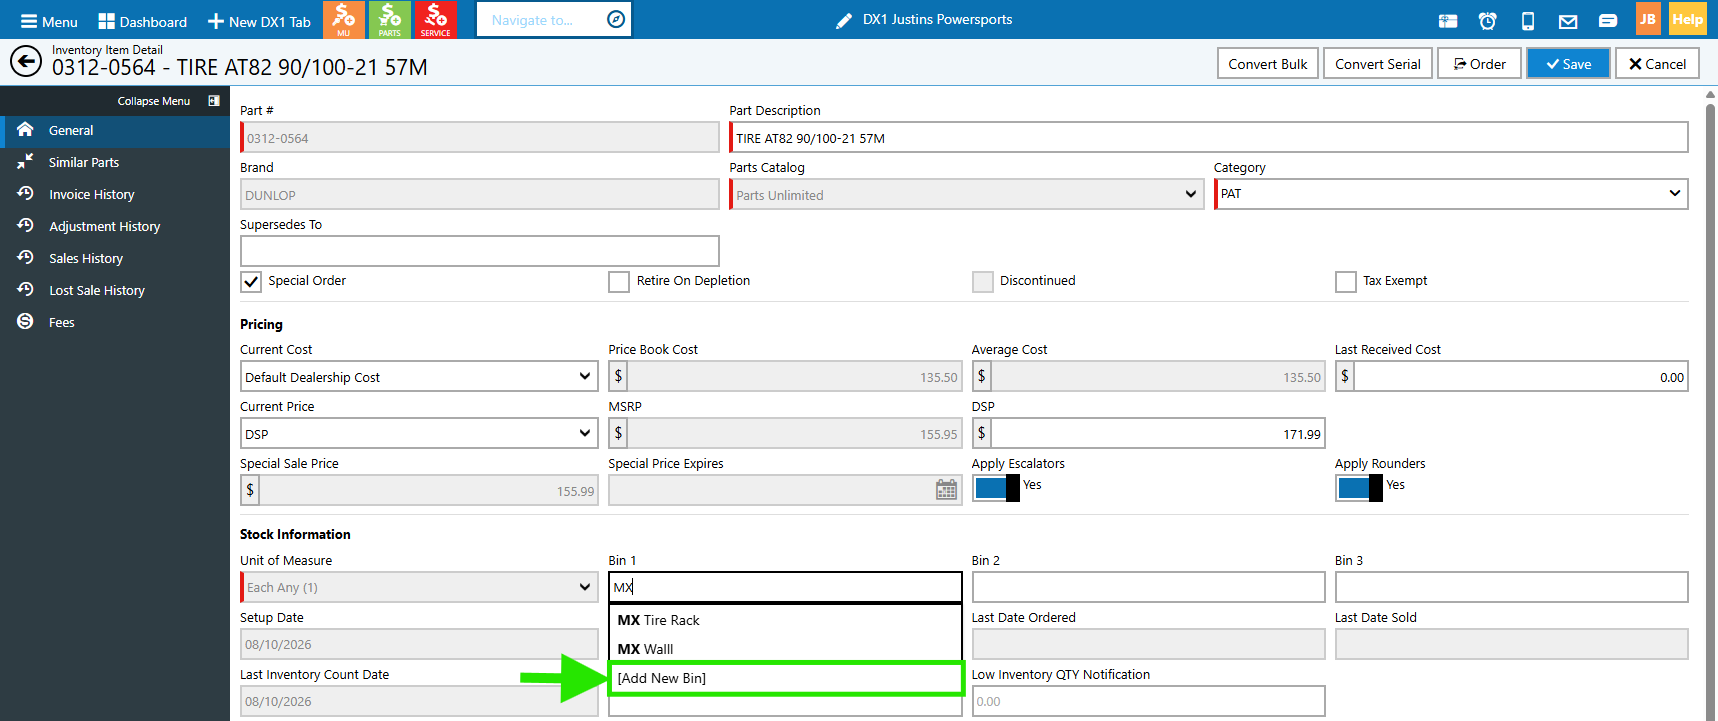
You can create a new bin directly from a Bin 1, Bin 2, or Bin 3 dropdown.
Start typing the new bin name, then select Add New Bin Name or click the "tab" or "enter" button on your keyboard. If the name does not already exist, the new bin is created, selected in the field, and added to the Bin Management list. If the bin name already exists, the existing bin is selected instead, to prevent duplicate bin names.
Bin Management During Physical Inventory
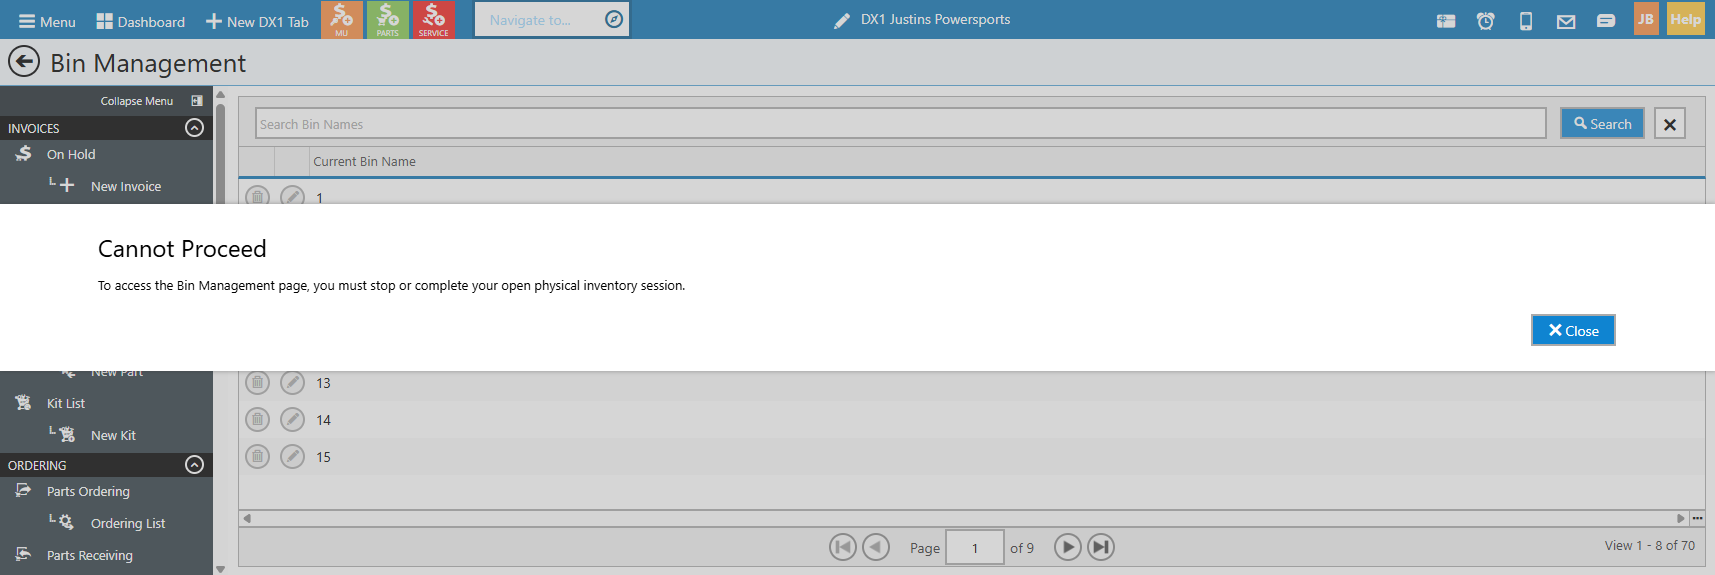
If a physical inventory session is in progress, you can still open and view the Bin Management page. However, editing and deleting bin locations are disabled until the physical inventory session is stopped or completed.
Important Things to Know
Bin names must be unique within your dealership, although the same bin can be assigned to more than one of the Bin 1, Bin 2, and Bin 3 fields for the same part. When a bin is renamed or deleted, updates to impacted part records may take up to 2 hours to appear throughout the system (Invoices, grids, etc).