Charge to Major Unit
Note: When working with ANY Invoice, each user will need to click save button at least every 20 minutes. If a user walks away from the open Invoice without saving within that 20 minute time frame changes to the Invoice will be lost!
- From the Dx1 dashboard click on the red Sales tile under Service

2. Click the + New Estimate button on the Active Invoices page

3. You can either enter the sock number of the unit and hit tab or click the magnifying glass

Or click on the magnifying glass to search for the unit. Click on the Charge to MU button to access the current inventory

Use the filters at the top of the inventory box to choose make, model, year, VIN/HIN/SN/Stock #, or color.
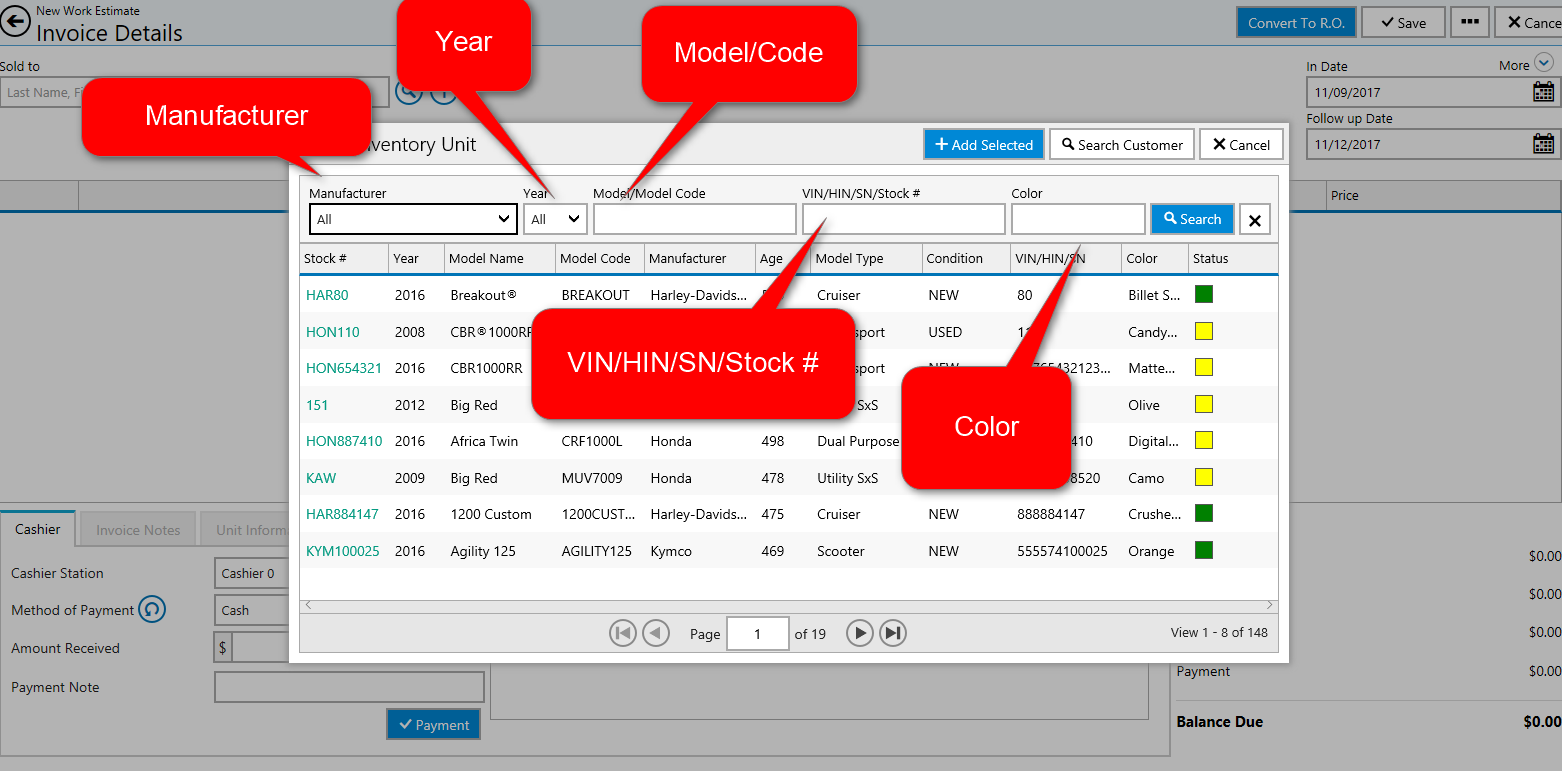
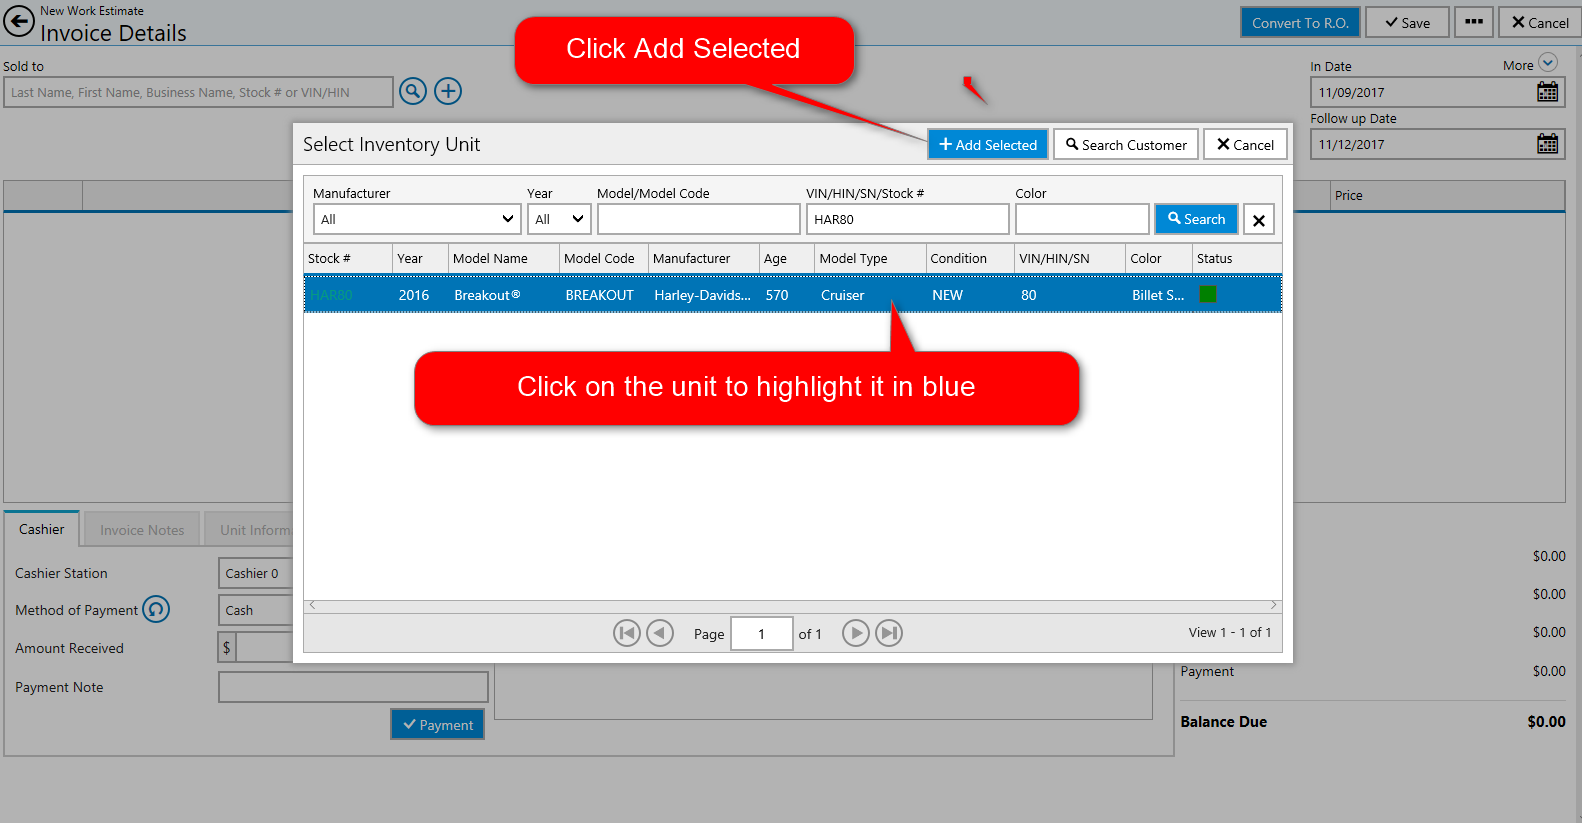
Click on the unit and choose Add Selected
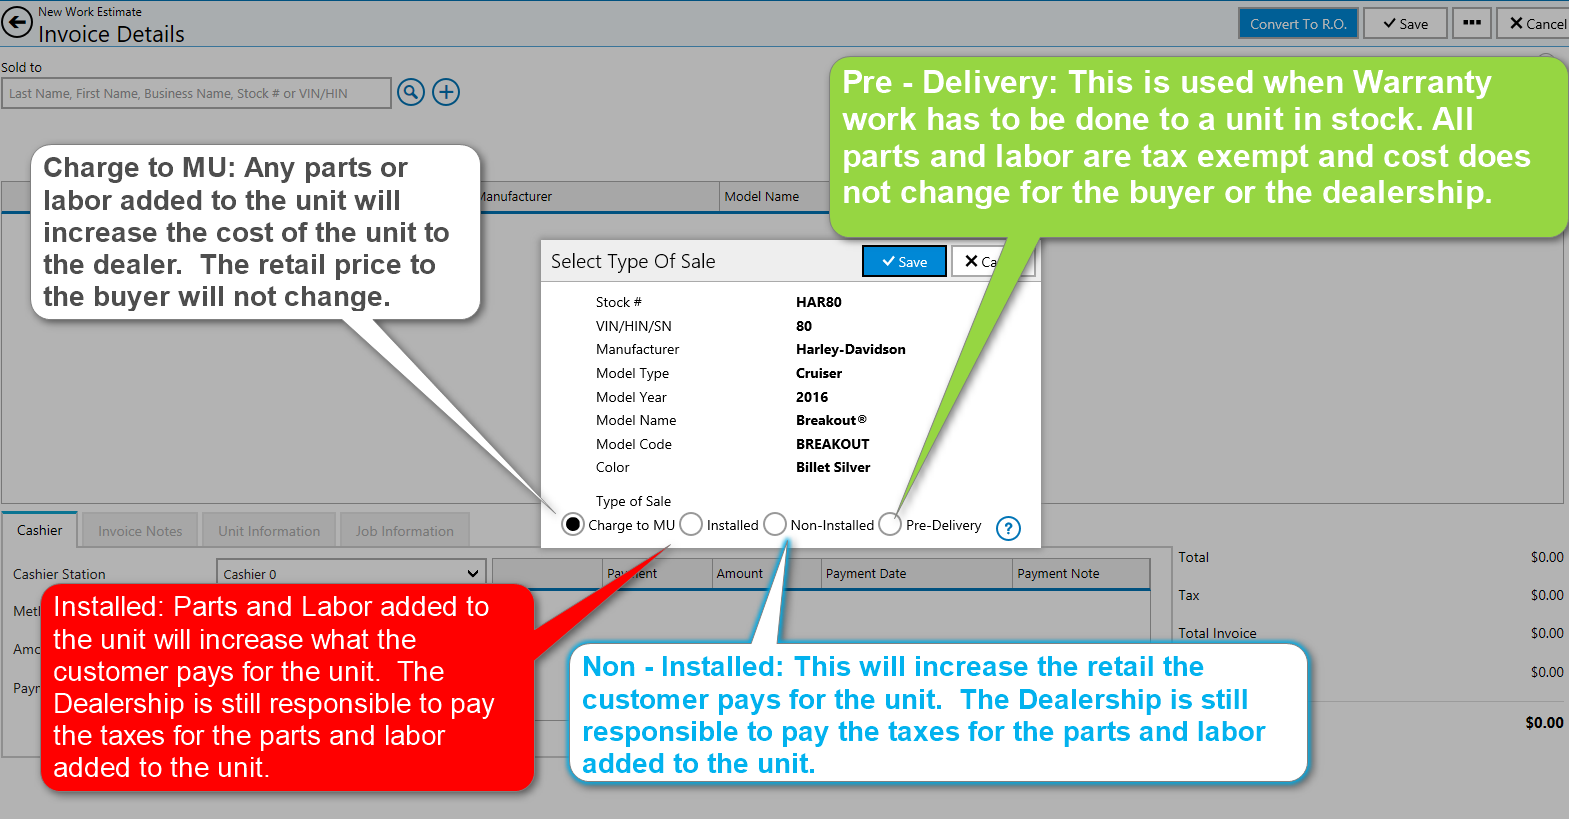
4. Once the unit has been selected the user will need to choose the type of work to be done to the unit. The user can click on the question mark in the lower right-hand corner of the box to see the definitions for each type of work.
Charge to MU: Any parts or labor added to the unit will increase the cost of the unit to the dealer. The retail price to the buyer will not change.
Installed: Parts and Labor added to the unit will increase what the customer pays for the unit. The Dealership is still responsible to pay the taxes for the parts and labor added to the unit.
Non-Installed: This will increase the retail the customer pays for the unit. The Dealership is still responsible to pay the taxes for the parts and labor added to the unit.
Pre-Delivery: This is used when Warranty work has to be done to a unit in stock. All parts and labor are tax exempt and cost does not change for the buyer or the dealership.
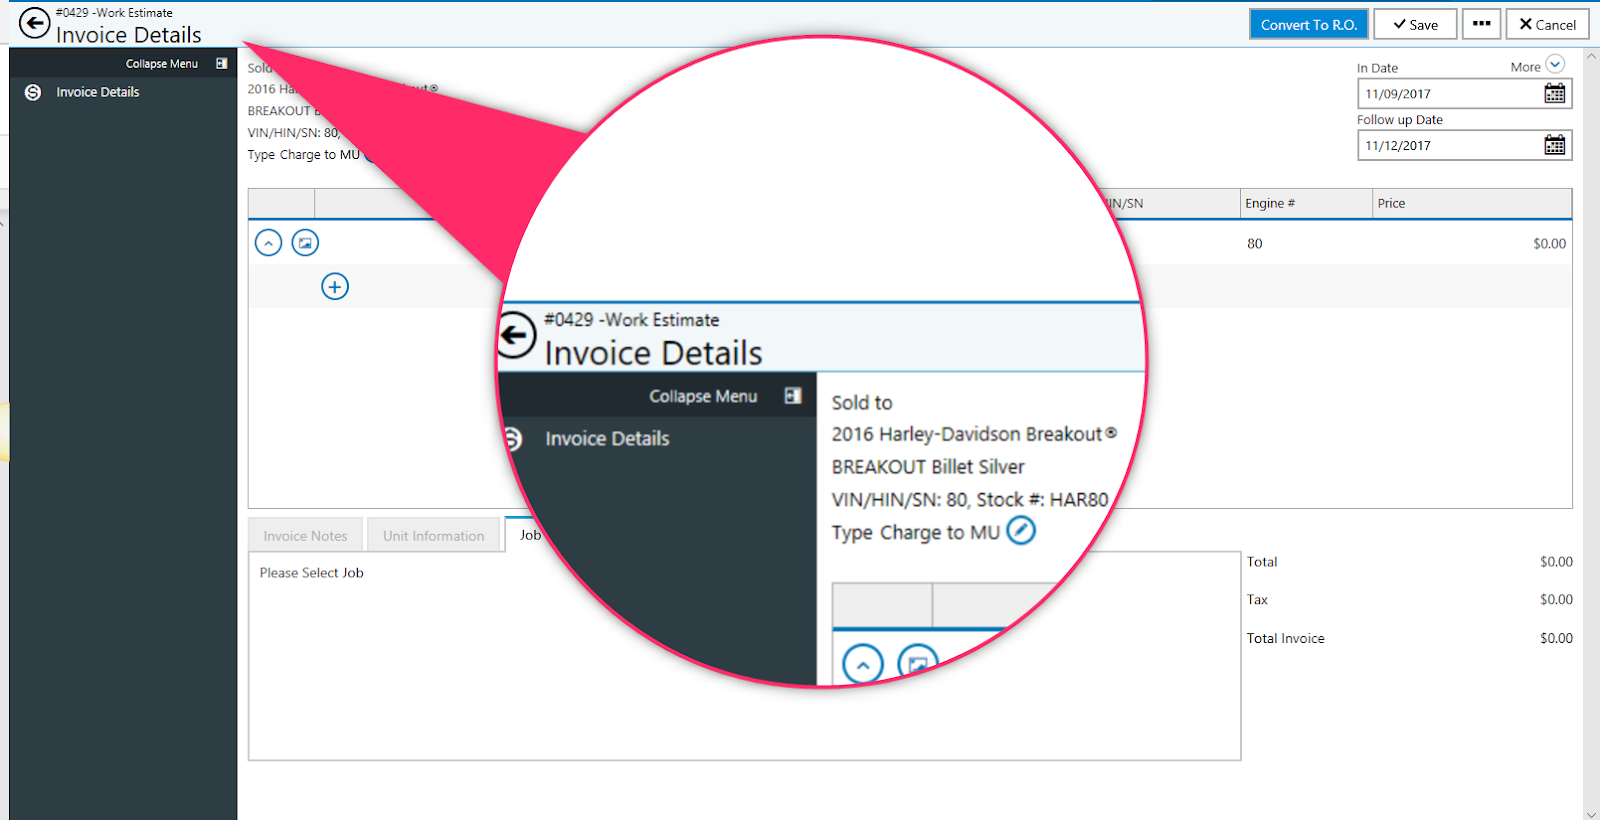
5. Once the proper option has been chosen click the save button. The user will now be taken back to the main screen for the estimate. Under the Sold To field the information on the unit will appear.
6. From here the rest of the Repair Order process remains the same. A new job will need to be added.
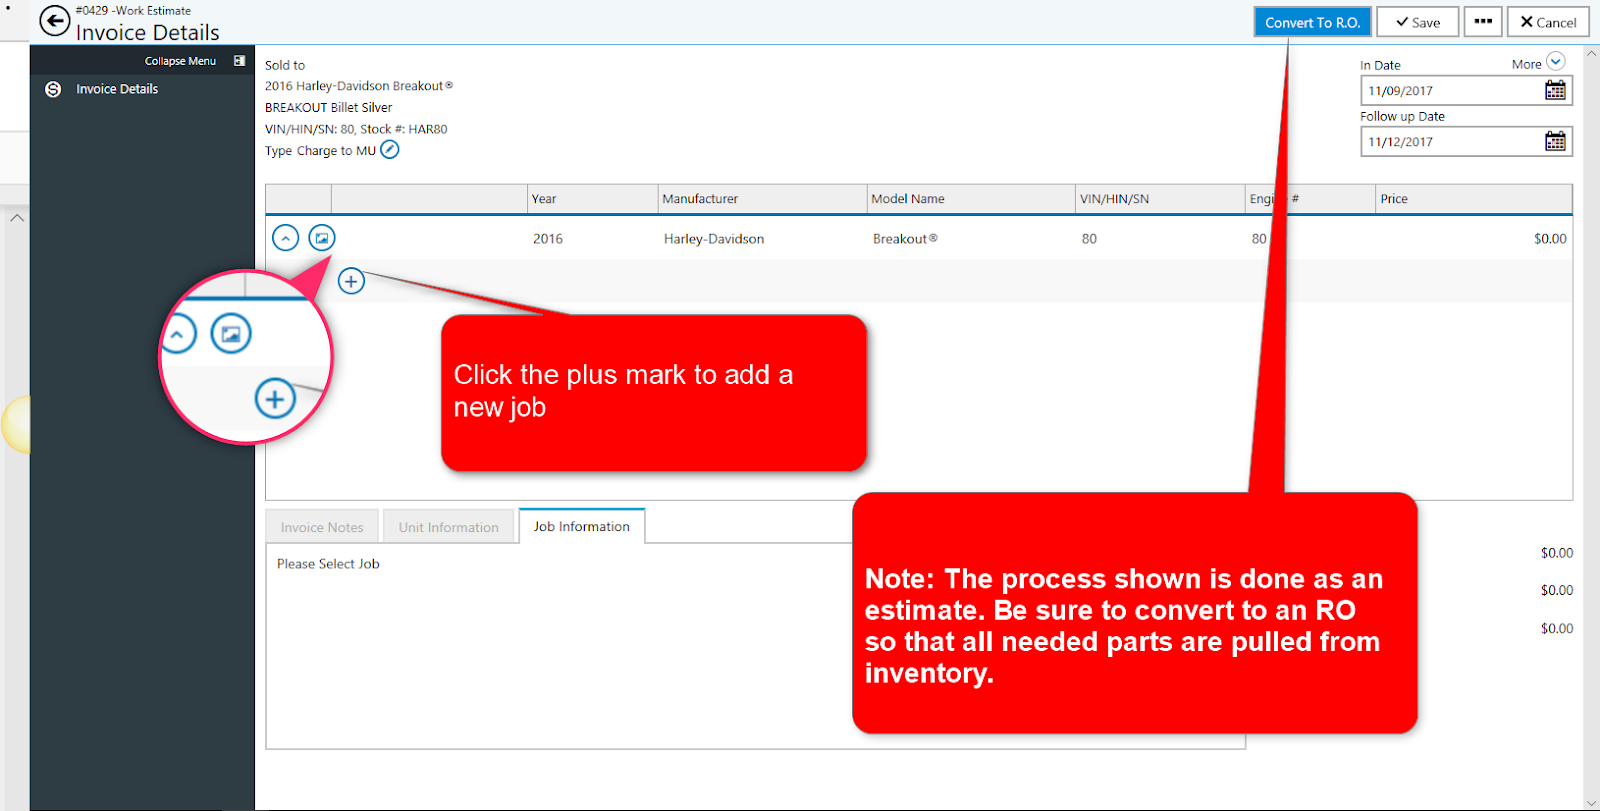
7. Once the job is added proceed with the rest of the Repair Order as normal.
Support
For additional support or questions regarding functionality, you can contact our customer support team in a number of ways shown below. Again it is mandatory for dealers to get with their accounting and business departments to understand the rules and regulations for your local, state, and federal laws.
