
Open an existing photo
-
1
Open the unit's images
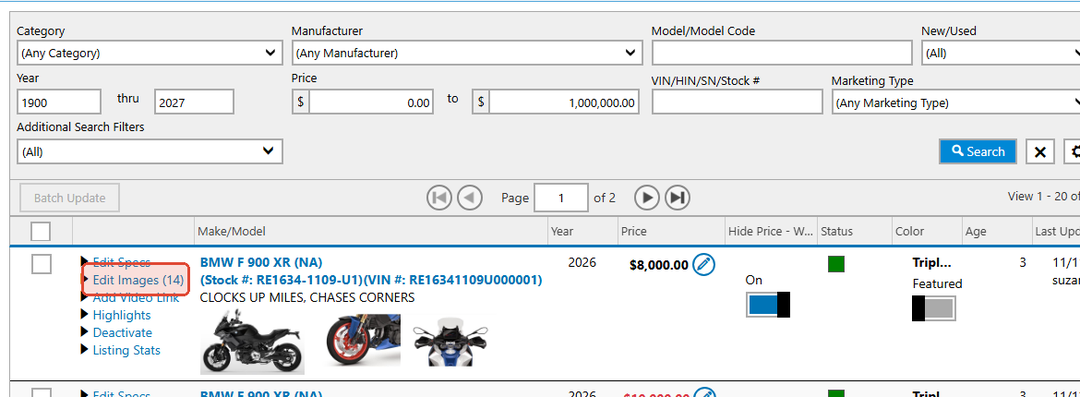
In Listing Inventory, find the unit you want to update and select Edit Images.
-
2
Open the photo editor
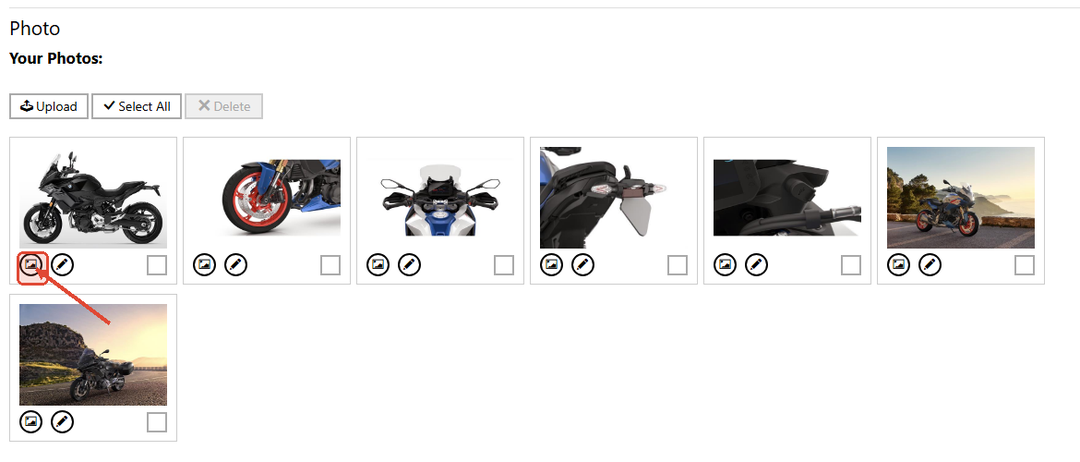
Under Your Photos, select the Edit image icon in the lower-left corner of the photo. It looks like a small picture inside a circle and appears immediately to the left of the pencil icon.
Edit the photo
-
3
Choose an editing tool
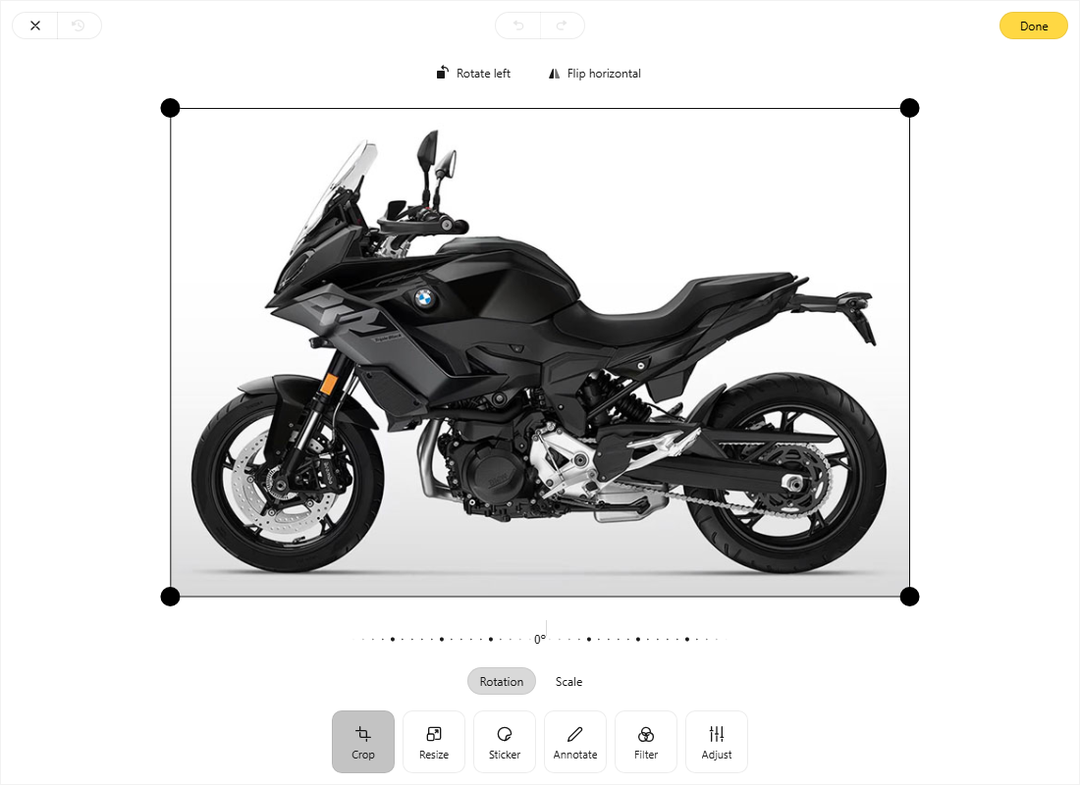
Use the tools along the bottom of the editor:
- Crop changes the visible area or rotates and flips the image.
- Resize changes the image dimensions.
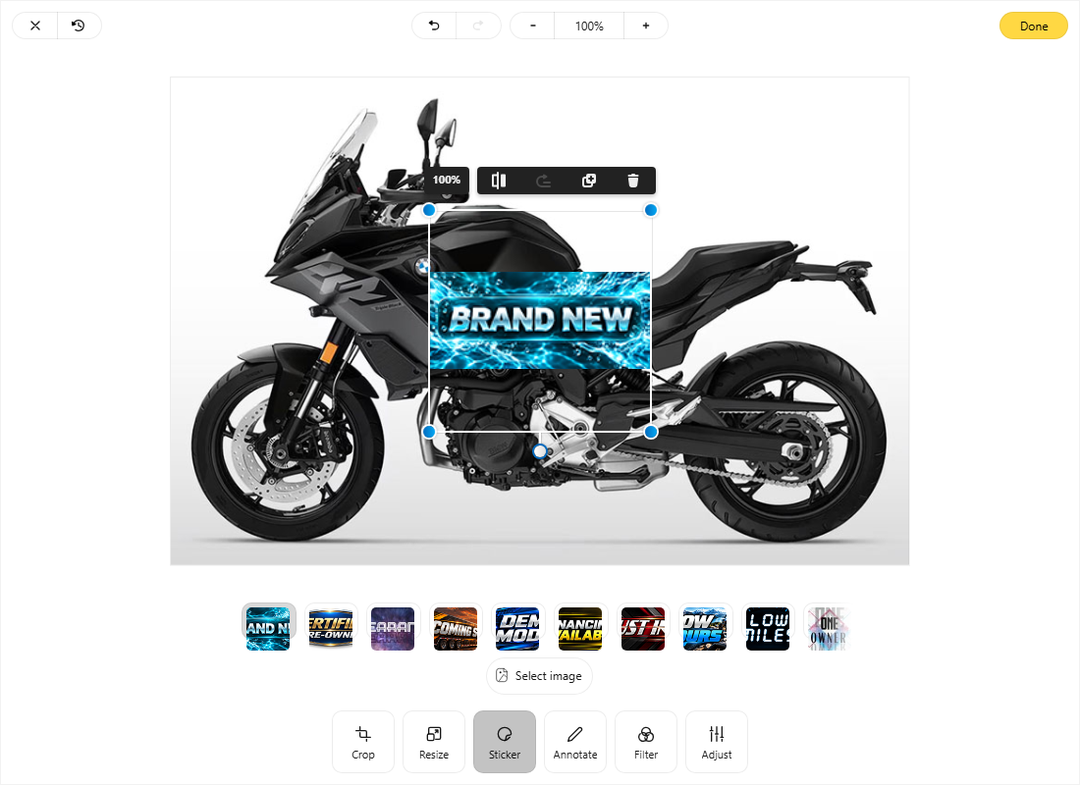
- Sticker adds artwork to the photo, including DX1 Highlights stickers.
- Annotate adds text, shapes, or drawing.
- Filter applies a visual filter.
- Adjust changes settings such as brightness, contrast, and saturation.
-
4
Add a Highlights sticker
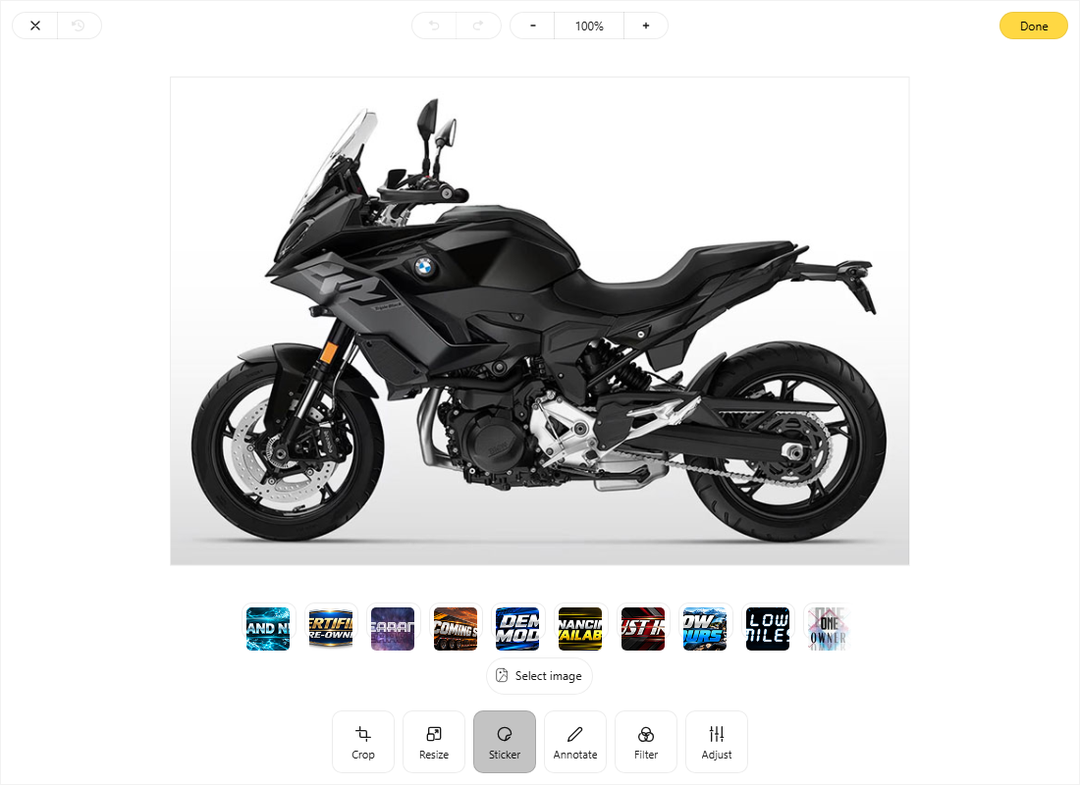
Select Sticker, then choose the artwork you want to add. The available collection includes options for common selling points such as Brand New, Certified Pre-Owned, Clearance, Low Miles, Price Reduced, and Sold.
-
5
Position the sticker
Drag the sticker to the desired location. Use its handles to resize or rotate it. The controls above the selected sticker can also flip, duplicate, or remove it.
Save the edited photo
-
6
Select Done and choose how to save
Select Done, then choose one of the following:
- Replace original replaces the existing photo with the edited version and keeps its position in the photo order.
- Save as copy adds the edited version as a new photo and leaves the original unchanged.

DX1 refreshes the photo list after the edited image is saved.